How to make your school's desktop computer a personal server and set up Globus Connect Server on it?
Most computer science major Ph.D. students at the University of Chicago will get assigned a desktop computer at the office. The computer is usually a bit old and may not be ideal for a student’s main research work. Many students just ignore the desktop computer entirely and use their laptop only. It is such a waste of resources in my view. The desktop computer can serve as a perfect machine for building a personal server. Students can test all HPC/cloud computing related software first on this low-end personal server to eliminate potential problems.
We can install any operating systems and utilize the full disk space of the desktop computer with a USB drive. I installed Ubuntu 24.04. The computer has 16 CPU cores, 16GB memory, and the total disk space is 512GB. Also, the computer has ethernet connection to the school network, which is quite reliable and stable. It is a quite decent server in my opinion.
I highly encourge you to override the default system provided by the school! The default system is a weird version of Ubuntu and your home directory has only 5GB of space with no sudo privileges. It is also extemely slow which makes people feel the computer is bad but it is actually because of their network-based access design.
Globus Transfer is a good tool to install on a server as we will use it a lot for data transfer between HPC clusters. People can simply install the Globus Connect Personal to make things easier, but to utilize the full features and treat the desktop computer as an actual server, we will install Globus Connect Server.
1. Preparation
I connect my computer to my personal router and the router is connected to the school network. Therefore, my computer is under a NAT network, and the only public IP I have is the router’s IP. You can check the public IP with the following command:
1
curl ifconfig.me
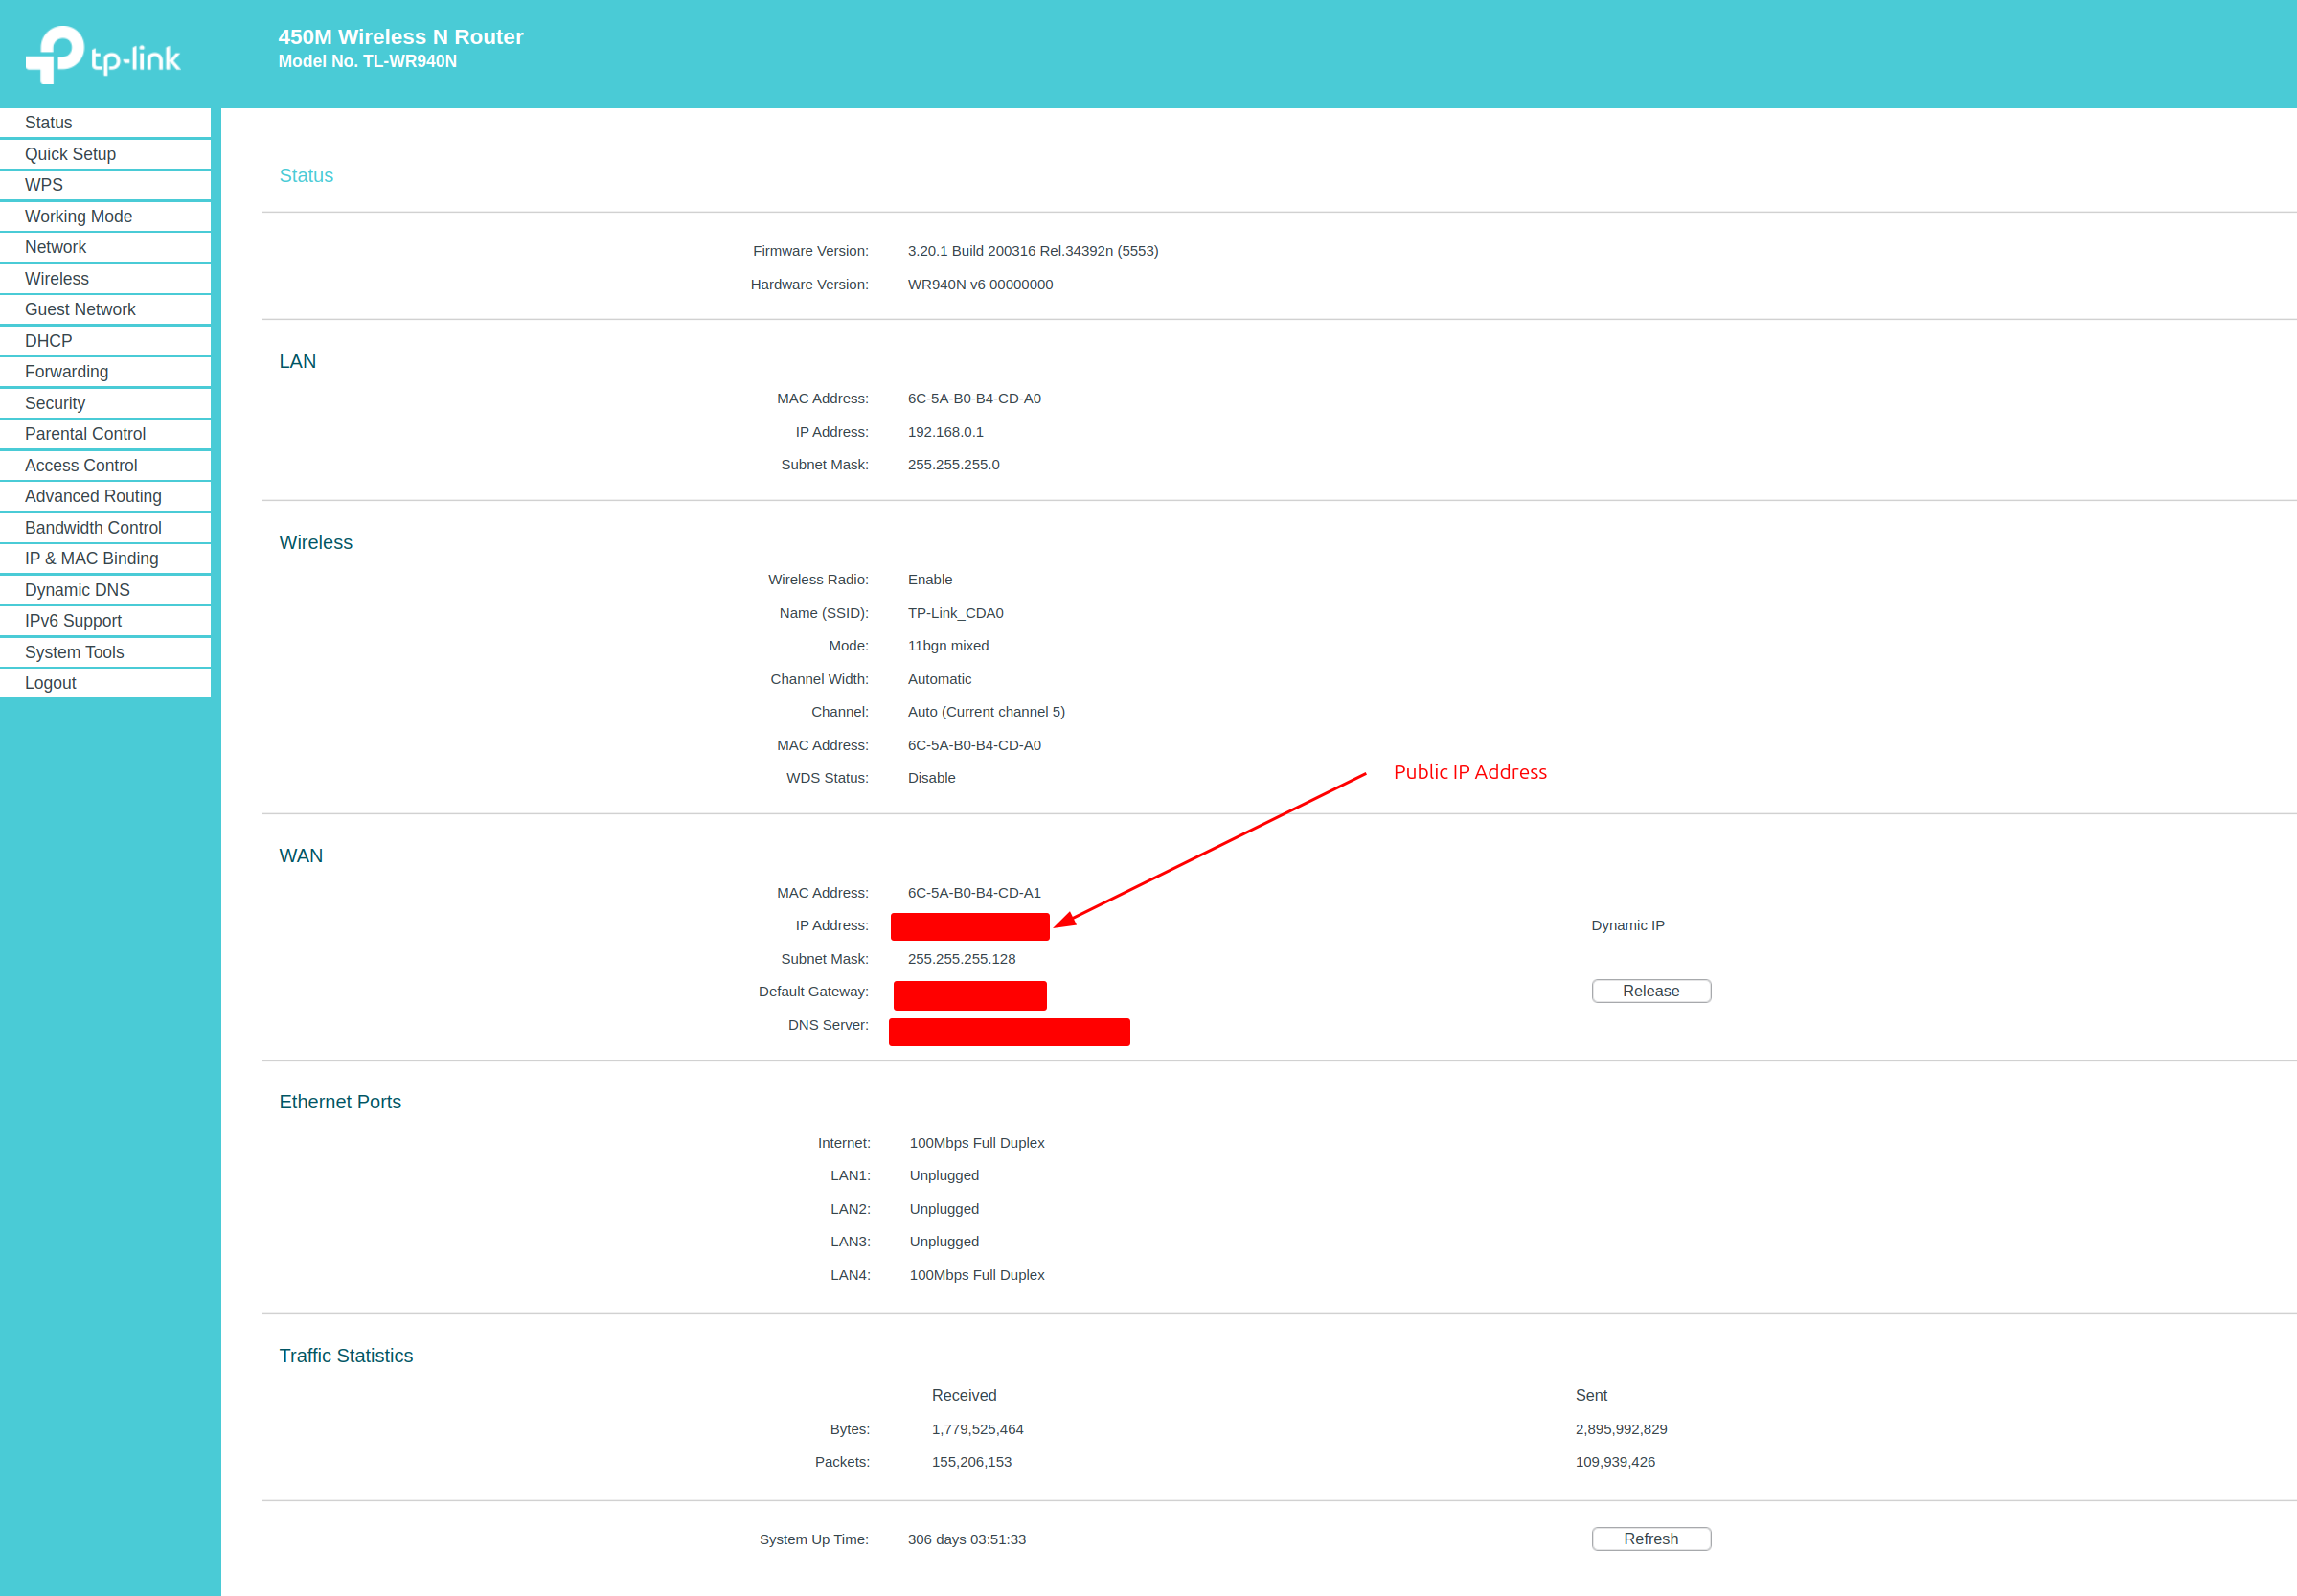
Or you can also log in to the router’s admin page to see the information as shown in Figure 1.
 Figure 1. TP Link admin page and status.
I use CAPITAL_CASE_INFORMATION to block certain sensitive information like my public ip address, subscription id, globus client id, etc. Please use your own information rather than copy them directly.
1.1 Set a static ip address for your computer
We need a static ip because we don’t want the dhcp server to give the computer a different ip address when we wake up the next day. On Linux, the static ip can be achieved through netplan by creating the following file.
1
sudo vim /etc/netplan/00-installer-config.yaml
The content shold be roughly the following. The routes-via should be your router’s address, and the enp0s31f6 should be your network interface shown in ifconfig command. I chose the 192.168.0.102 to be the static ip address for the server.
1
2
3
4
5
6
7
8
9
10
11
12
13
14
network:
  ethernets:
    enp0s31f6:
      dhcp4: no
      addresses:
        - 192.168.0.102/24
      routes:
        - to: default
          via: 192.168.0.1
      nameservers:
        addresses:
          - 8.8.8.8
          - 8.8.4.4
  version: 2
1.2 ssh port forwarding
To make this computer a server, we need to set a few Port Forwardings on the router to expose the computer to the public network.
 Figure 2. TP Link router port forwarding setting.
The 22 port allows us to connect to the computer from any network with ssh, just like a cloud server. I’ll set up one entry of the config file in ~/.ssh/config in my laptop computer (NOT this server computer) as the follows:
1
2
3
Host jcl399
    HostName THE_PUBLIC_IP_ADDRESS
    User yuanjian
I also need to copy the public ssh key into ~/.ssh/authorized_keys (on this server computer), and then I can log in to the server computer with ssh jcl399. The HostName needs the public IP, and the Host can be a random given name (I use jcl399 because this computer is in my office room 399 of John Crerar Library).
Don’t forget to install the openssh-server and ensure the ssh.service is enabled and running.
1
2
3
sudo apt update
sudo apt install openssh-server
sudo systemctl status ssh
You should see something like the following. If it is not active, just run sudo systemctl start ssh.
1
2
3
4
5
6
7
8
9
10
11
12
13
14
15
16
17
18
19
20
21
22
23
24
● ssh.service - OpenBSD Secure Shell server
     Loaded: loaded (/usr/lib/systemd/system/ssh.service; disabled; preset: enabled)
     Active: active (running) since Tue 2024-12-17 15:12:41 CST; 1h 37min ago
TriggeredBy: ● ssh.socket
       Docs: man:sshd(8)
             man:sshd_config(5)
   Main PID: 6256 (sshd)
      Tasks: 1 (limit: 18790)● ssh.service - OpenBSD Secure Shell server
     Loaded: loaded (/usr/lib/systemd/system/ssh.service; disabled; preset: enabled)
     Active: active (running) since Tue 2024-12-17 15:12:41 CST; 1h 37min ago
TriggeredBy: ● ssh.socket
       Docs: man:sshd(8)
             man:sshd_config(5)
   Main PID: 6256 (sshd)
      Tasks: 1 (limit: 18790)
     Memory: 2.5M (peak: 4.4M)
        CPU: 1.185s
     CGroup: /system.slice/ssh.service
             └─6256 "sshd: /usr/sbin/sshd -D [listener] 0 of 10-100 startups"

     Memory: 2.5M (peak: 4.4M)
        CPU: 1.185s
     CGroup: /system.slice/ssh.service
             └─6256 "sshd: /usr/sbin/sshd -D [listener] 0 of 10-100 startups"
1.3 Globus port forwarding
Globus requries port 443 (TCP), 2811 (TCP), and 50000-51000 (TCP and UDP) to work properly. Port 443 is for HTTPS, port 2811 is for GridFTP, and the rest ports are for data transfer.
2. Setup Globus Connect Server Endpoint
Then we need to install the Globus Connect Server software with the following commands. It is a good habit to check Globus’ official documentation especially if you decided to install some other operating systems.
1
2
3
4
5
curl -LOs https://downloads.globus.org/globus-connect-server/stable/installers/repo/deb/globus-repo_latest_all.deb
sudo dpkg -i globus-repo_latest_all.deb
sudo apt-key add /usr/share/globus-repo/RPM-GPG-KEY-Globus
sudo apt update
sudo apt install globus-connect-server54
Set up the endpoint. You will need an application id before this. You can create a Globus project and get the id from app.globus.org/settings/developers. To set up the endpoint, you do not need sudo privilege.
1
globus-connect-server endpoint setup "jcl399-desktop-yuanjian" --organization "University of Chicago" --owner "yuanjian@uchicago.edu" --contact-email "yuanjian@uchicago.edu" --project-id "THE_ID_OF_YOUR_PROJECT"
You also need to set up the node with the public ip address before the endpoint can be found.
1
sudo globus-connect-server node setup --ip-address "128.135.123.229"
After the node is set up, we need to log in with globus-connect-server login localhost. If this fails, you can specify the endpoint id manually like globus-connect server login THE_ID_OF_YOUR_ENDPOINT.
Then we can use globus-connect-server endpoint show to see the information about this endpoint. You should get information similar to the following.
1
2
3
4
5
6
7
8
Display Name:    jcl399-desktop-yuanjian
ID:              THE_ID_OF_YOUR_ENDPOINT
Subscription ID: None
Public:          True
GCS Manager URL: https://THE_DOMAIN_OF_THE_ENDPOINT.data.globus.org
Network Use:     normal
Organization:    University of Chicago
Contact E-mail:  yuanjian@uchicago.edu
We notice that the subscription id is None, which will limit the features of this endpoint. I am in the Globus Labs group, so I can find the subscription id from app.globus.org/groups, and add it to the endpoint with the following comand.
1
globus-connect-server endpoint set-subscription-id "THE_ID_OF_YOUR_SUBSCRIPTION"
3. Setup data access: Storage Gateway and Mapped Collection
Now, the endpoint is active but you still cannot transfer data with this endpoint. We need to set up the storage gateway and the mapped collection. Refer to the data-access-guide.
3.1 Create a storage gateway
1
globus-connect-server storage-gateway create posix "jcl399-gateway" --domain "uchicago.edu" --authentication-timeout-mins $((60*24*7)) --restrict-paths file:path-restrictions.json --user-deny root
The path-restrictions.json file specifies the path rules. Here is an example to limit users for $HOME directory access only:
1
2
3
4
5
6
7
8
9
{
    "DATA_TYPE": "path_restrictions#1.0.0",
    "read_write": [
        "$HOME"
    ],
    "none": [
        "/"
    ]
}
Use the globus-connect-server storage-gateway list command to see the existing gateways.
3.2 Create a collection
1
globus-connect-server collection create YOUR_GATEWAY_ID / "POSIX JCL399 Yuanjian Desktop home directories" --organization "University of Chicago" --contact-email "yuanjian@uchicago.edu" --description "Collection of Yuanjian's JCL399 personal server" --allow-guest-collections --sharing-restrict-paths file:sharing_restrictions.json --enable-https
The sharing_restrictions.json content will be the following for read-only access.
1
2
3
4
5
6
{
    "DATA_TYPE": "path_restrictions#1.0.0",
    "read": [
      "/"
    ]
}
Use the globus-connect-server collection list command to see the existing collections.
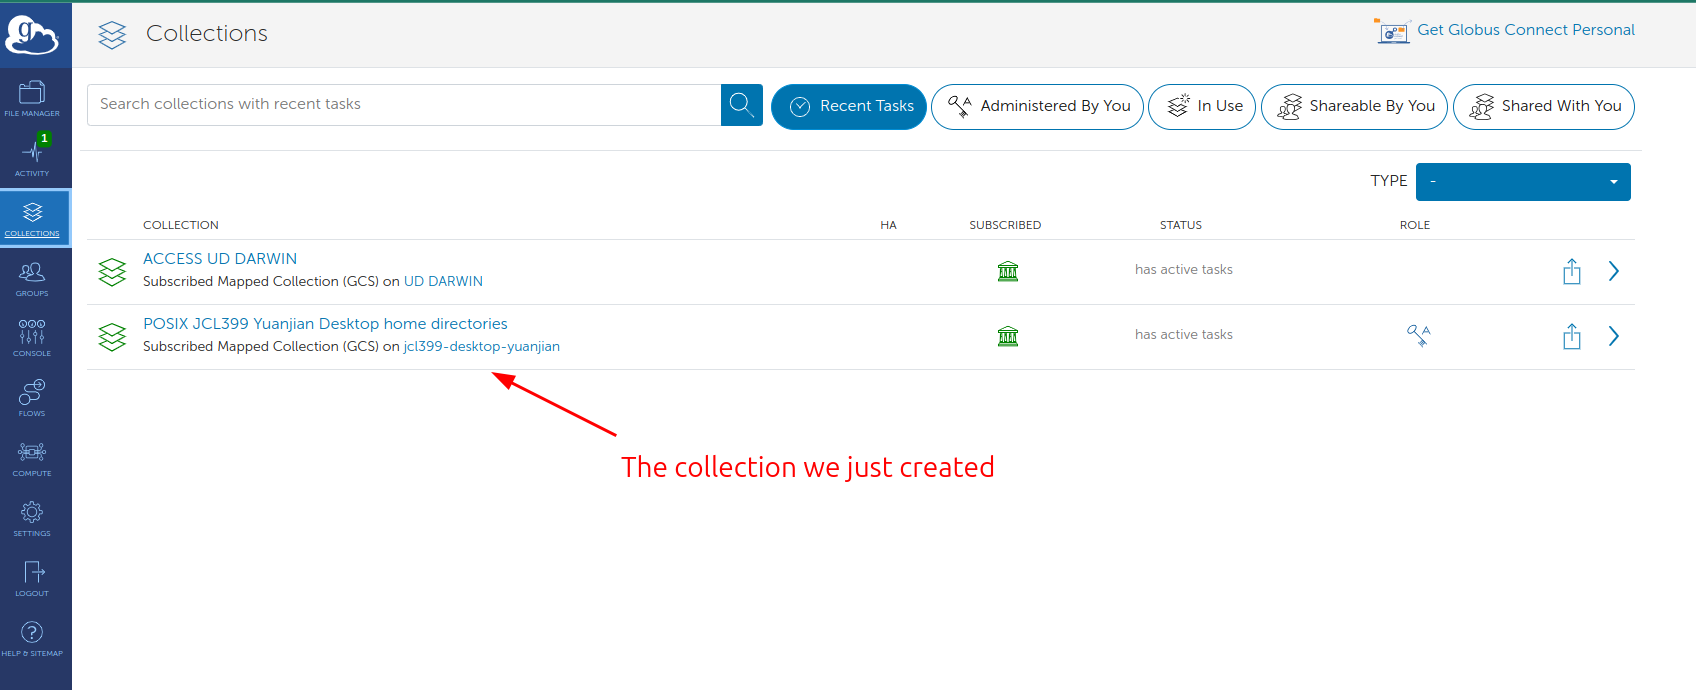
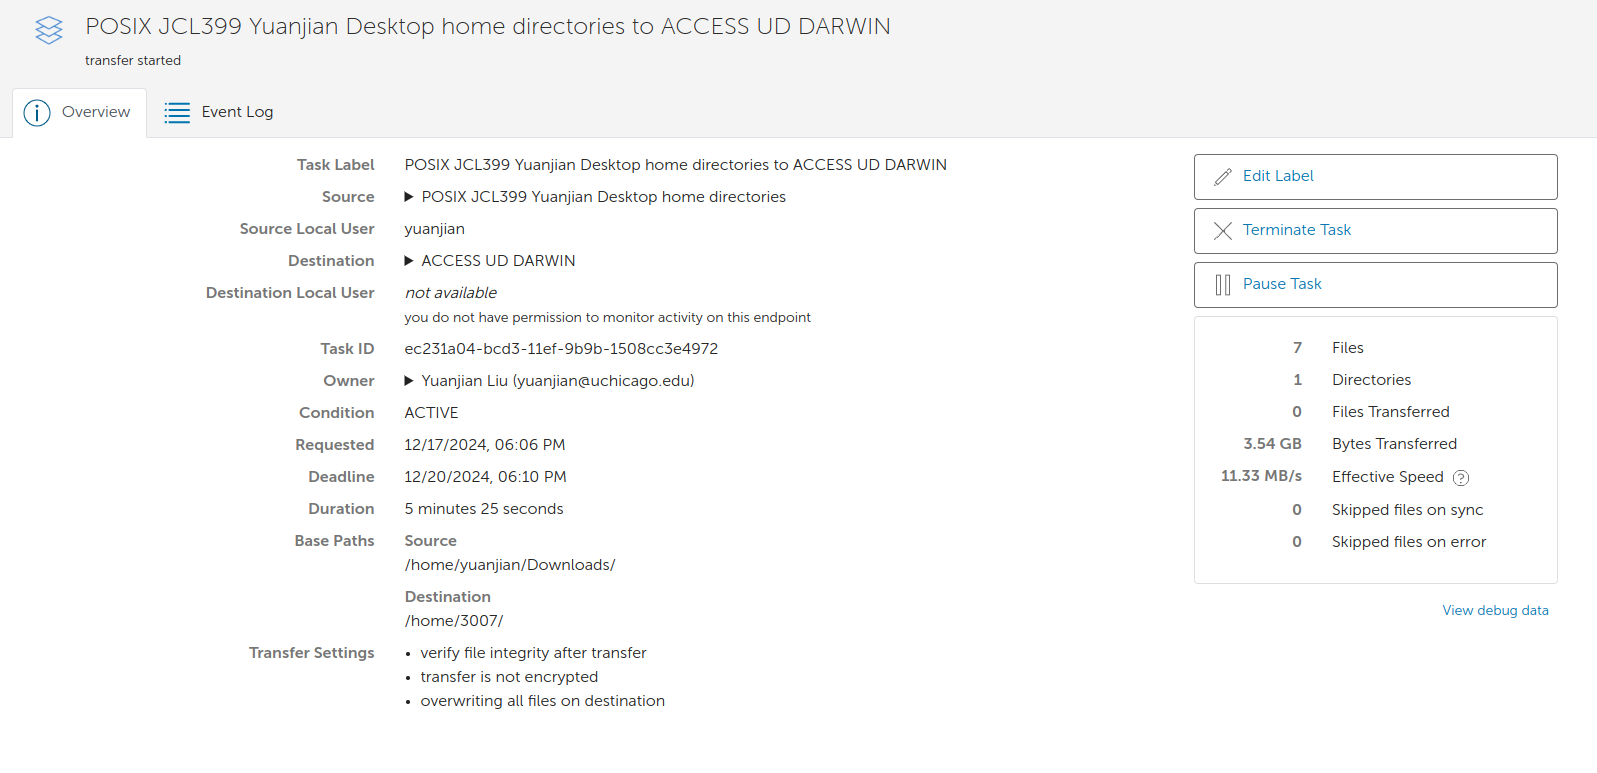
And now you should be able to see the collection on Globus Web App and transfer files from/to the collection as shown in Figure 3 and Figure 4.
 Figure 3. The created collection is visible on the Globus Web App.
